In my previous article I showed you how to use Azure DevOps to create a CI Pipeline, in this article will show you how to create a CD pipeline to deploy the .Net application on Azure app service, before proceeding further let us understand what CD pipeline is.
What is a continuous delivery pipeline? Continuous Delivery (CD) is a process by which code is built, tested, and deployed to one or more test and production environments. Deploying and testing in multiple environments drives quality. CI systems produce the deployable artifacts including infrastructure and apps. Automated release processes consume these artifacts to release new versions and fixes to existing systems. Monitoring and alerting systems run continually to drive visibility into the entire CD process. The Release service in TFS helps you set up and manage CD for your applications.
Now let us go through the steps:
Image-1
Login to Azure portal
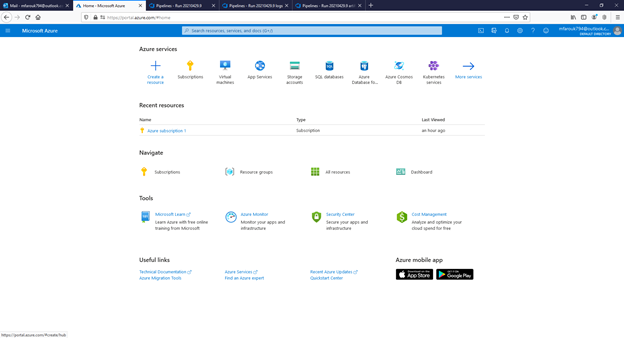
Image-2
Click create resource then choose web then search for web app then press enter.
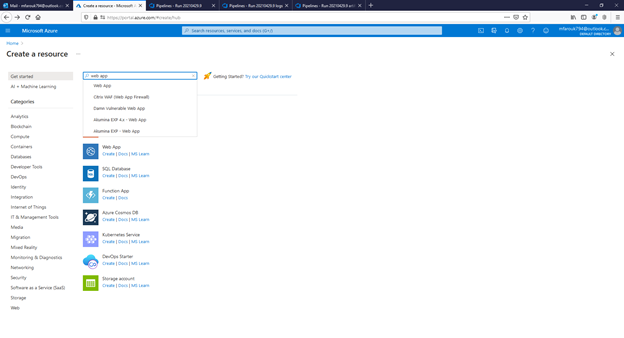
Image-3
Search in the search box for Web App and once appeared choose it.
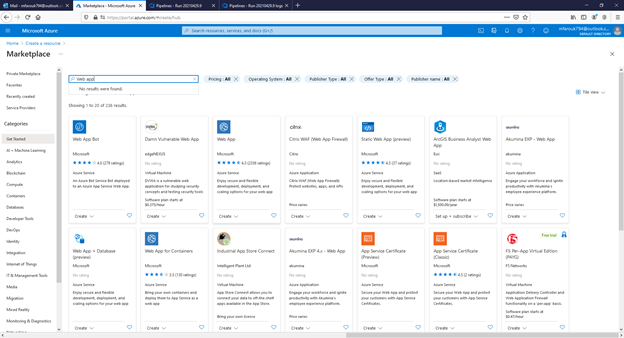
Image-4
Click create to proceed with creating web app and App Service as well.
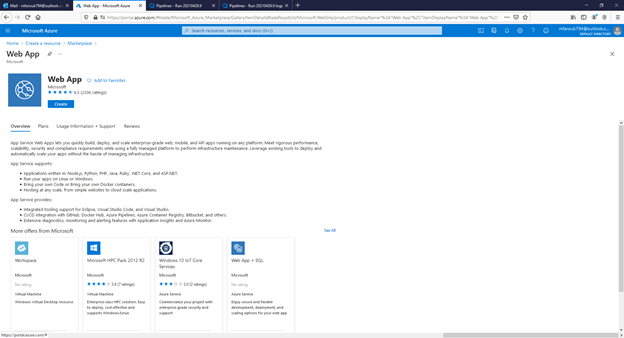
Image-5
Fill the details required like name for the web application which should be unique across Azure Web Apps, runtime stack, Operating system, and the location.
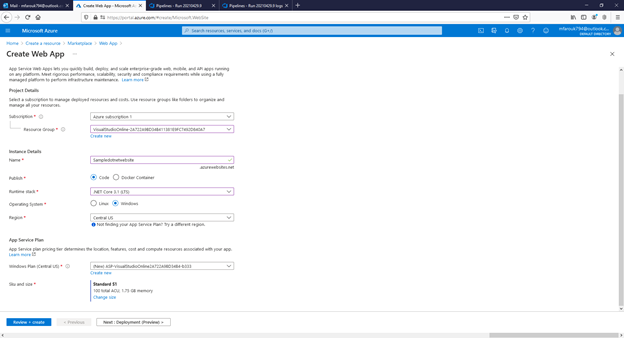
Image-6
For the SKU and Size will choose the free tier as this is for demo purpose only, click change size, after choosing the shared Infrastructure click apply.
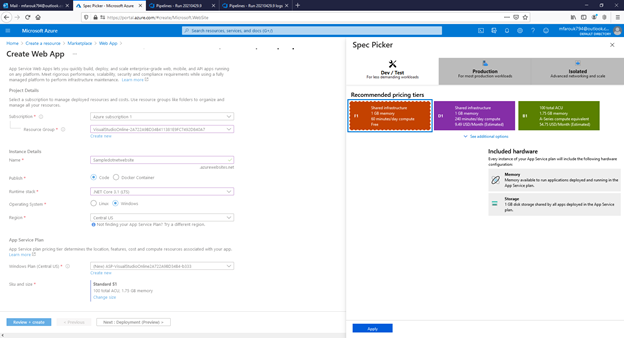
Image-7
Click Review + Create.
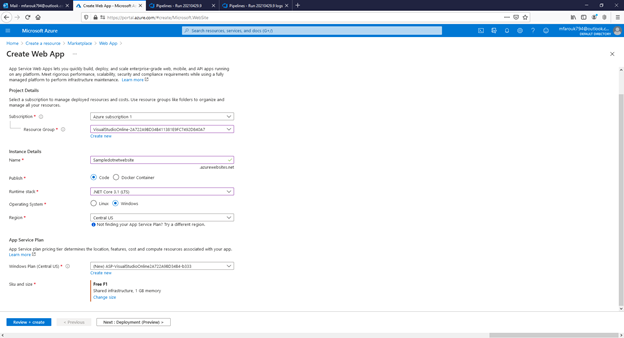
Image-8
Click create.
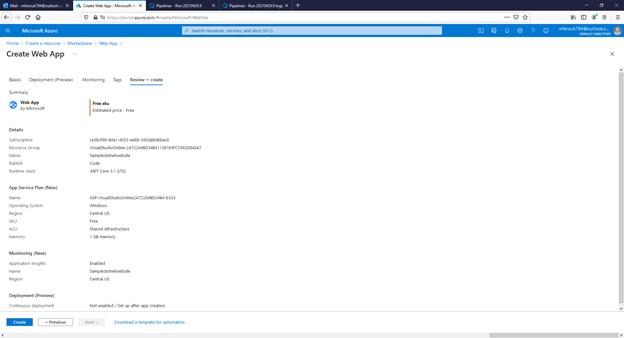
Image-9
Now deployment completed and we can go to resource.
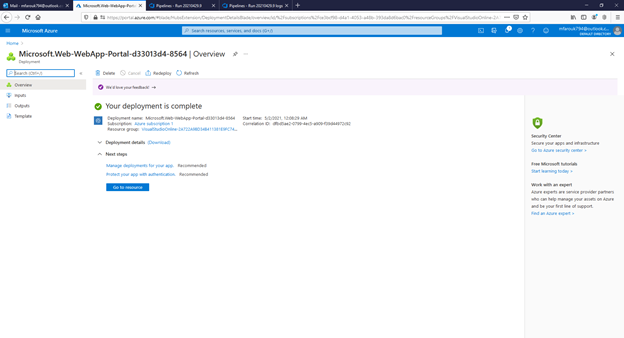
Image-10
We can see that app service created successfully and we can access the sample application URL.
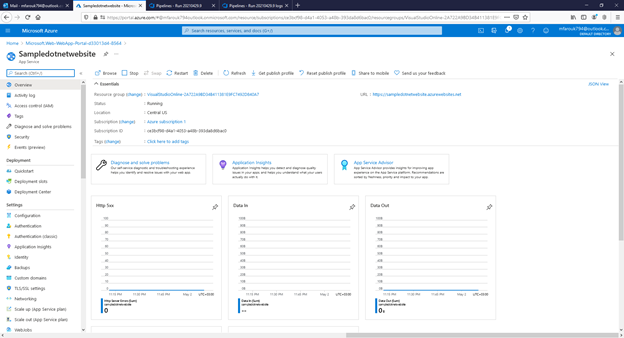
Image-11
This the default sample application home page that we will override after deploying the application using AZURE DevOps CD pipeline.

Image-12
Now let us go back to Azure DevOps to start creating AZURE CD pipeline to deploy the sample .Net core web application, click on pipeline then choose releases.
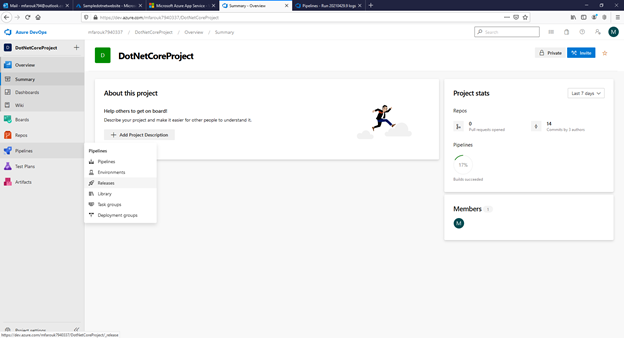
Image-13
Click new pipeline.
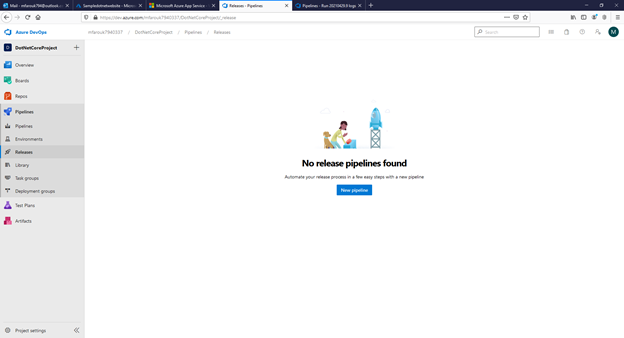
Image-14
As we can see we have multiple deployment options, but for our application will select “Azure App Service Deployment” and click apply.
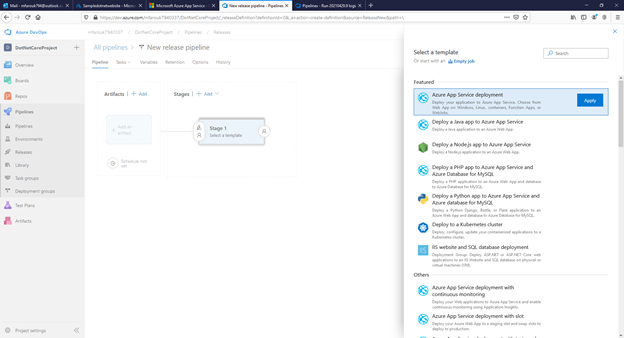
Image-15
Now we need to add an artifact to use in deployment so click on Add artifact, we will get it from the build we previously created in my previous post and specify the source then click add.
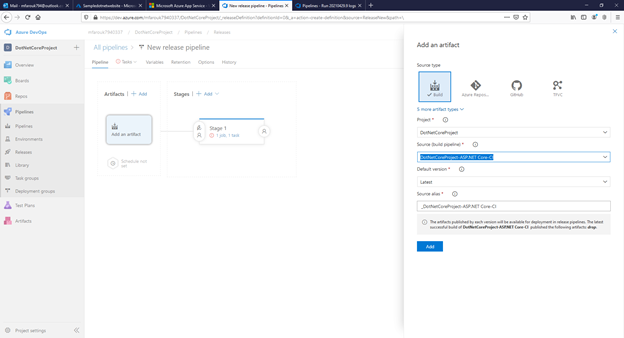
Image-16
Now we need to configure Stage 1 job to be able to run the task, click on 1 job, 1 task.
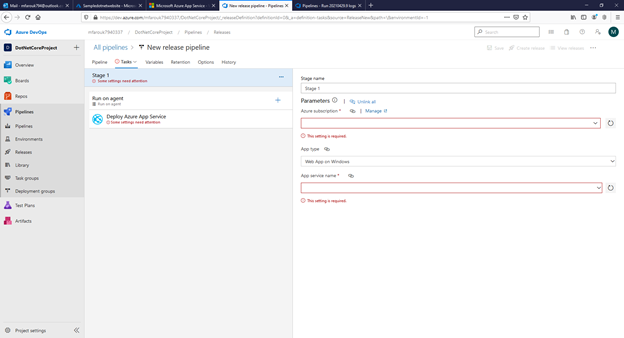
Image-17
Enter the subscription you want to use for your deployment and after that we need to authorize DevOps to be able to deploy the application to this subscription.
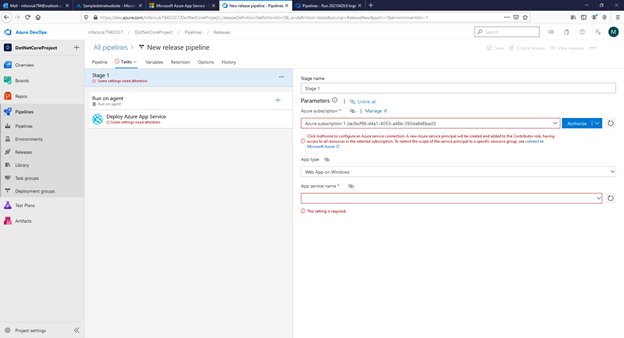
Image-18, 19
Click Authorize, a new popup window will open to perform authorization, enter your credentials and click next then sign in.
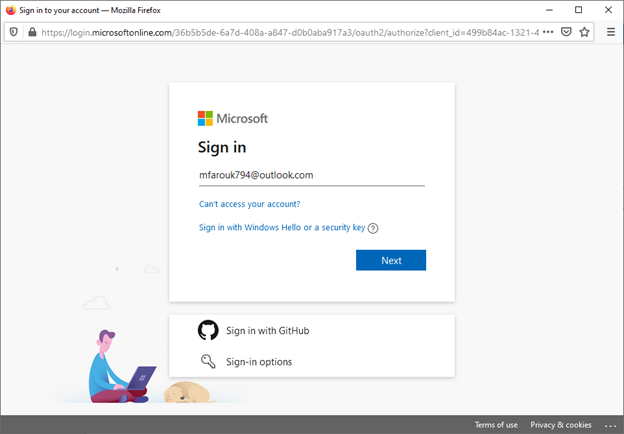
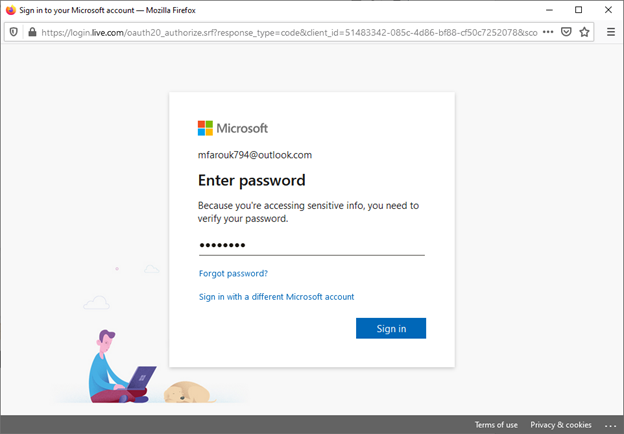
Image-20
After competing authorization, the popup window will disappear and we will be able to choose the App Service and the application we created previously from Azure portal.
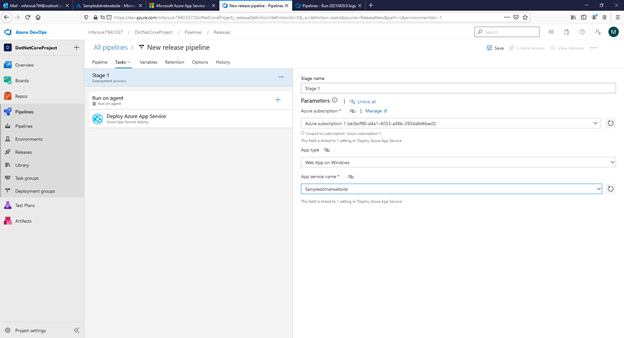
Image-21
Click on Deploy Azure App Service, click on package or folder in the right-hand side that we can specify the artifact already create by our CI pipeline.
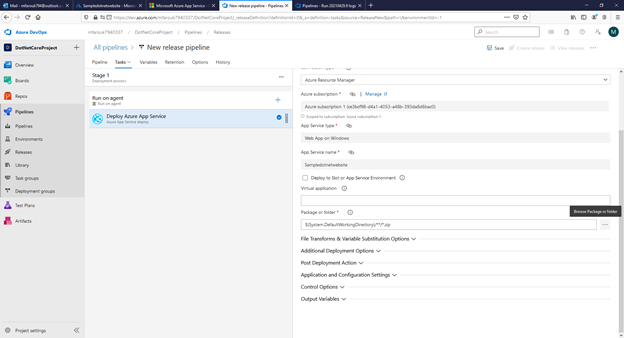
Image-22
After choosing the zip file click Ok
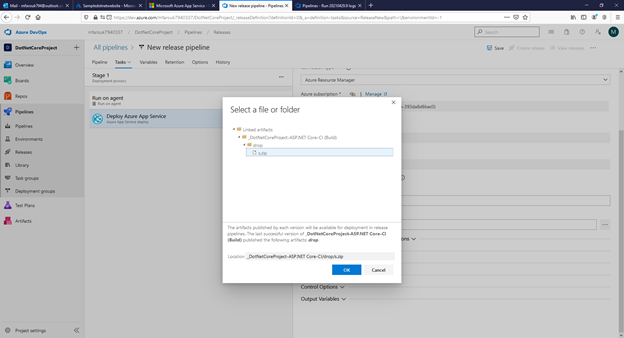
Image-23, 24
Click Save and Ok
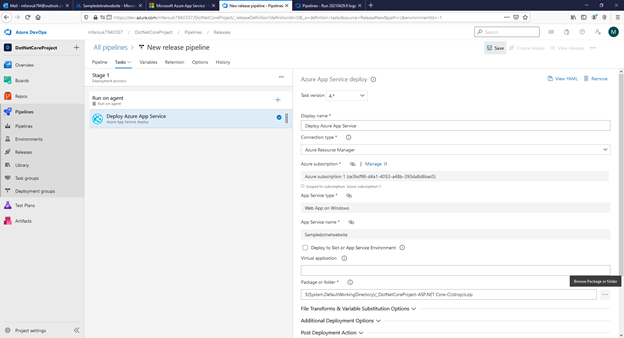
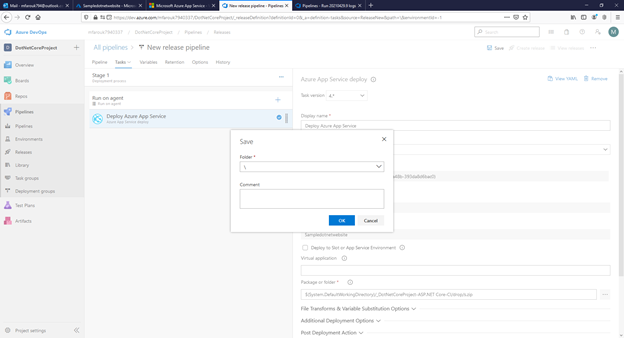
Image-25
Let us run CD pipeline to deploy the application on AZURE App Service, click create release then click create.
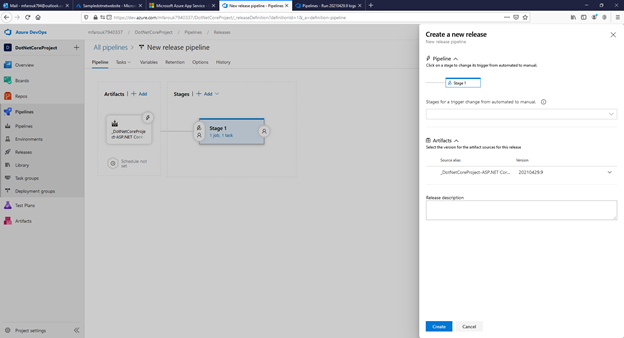
Image-26
Click on Release-1 in the green ribbon to see the progress of the deployment.
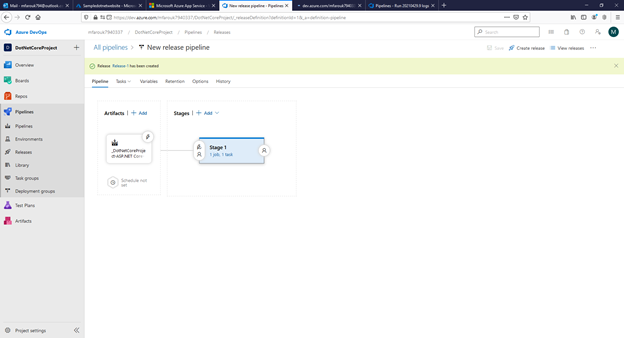
Image-27
We can see the progress of the deployment.
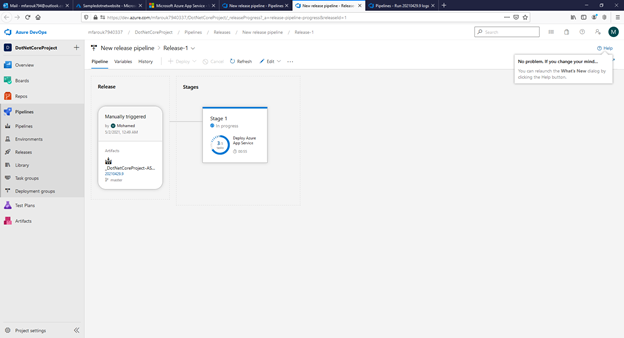
Image 28
Let us return to the .Net Application home page to see it after deployment.

References:
https://docs.microsoft.com/en-us/azure/devops/pipelines/get-started/what-is-azure-pipelines
https://docs.microsoft.com/en-us/azure/devops-project/azure-devops-project-github
https://docs.microsoft.com/en-us/azure/architecture/example-scenario/apps/devops-dotnet-webapp