In this article we will discuss about migrating a SQL Server database from On-Premises to AZURE SQL.
We will discuss about:
1- Creating SQL Server on AZURE, Azure SQL Database is a fully managed platform as a service (PaaS) database engine that handles most of the database management functions such as upgrading, patching, backups, and monitoring without user involvement. Azure SQL Database is always running on the latest stable version of the SQL Server database engine and patched OS with 99.99% availability. PaaS capabilities that are built into Azure SQL Database enable you to focus on the domain-specific database administration and optimization activities that are critical for your business.
2- Using Microsoft Data migration assistant for assessing and migrating On-Premises database to AZURE, DMA helps you upgrade to a modern data platform by detecting compatibility issues that can impact database functionality in your new version of SQL Server or Azure SQL Database. DMA recommends performance and reliability improvements for your target environment and allows you to move your schema, data, and uncontained objects from your source server to your target server.
You can download it from the following link: https://www.microsoft.com/download/details.aspx?id=53595
Now let us go through the steps:
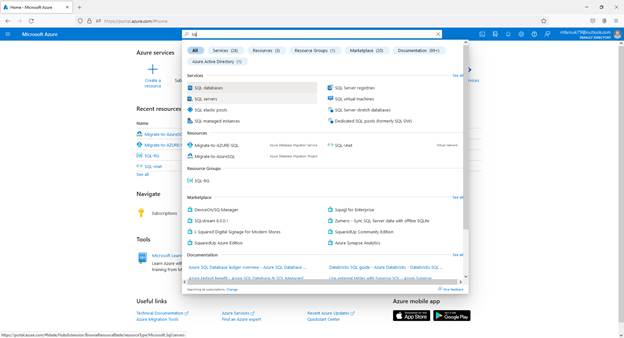
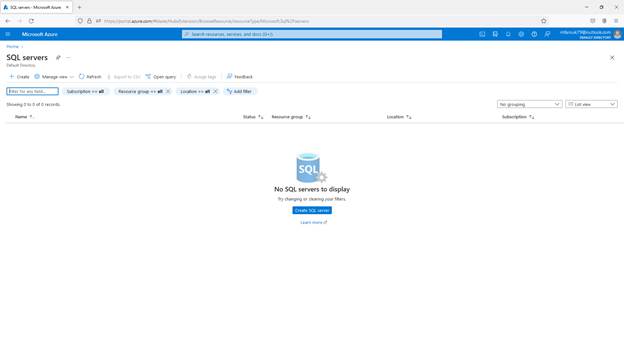
- Create SQL Server, from Azure portal search for and choose SQL Server
- Click on create SQL Server
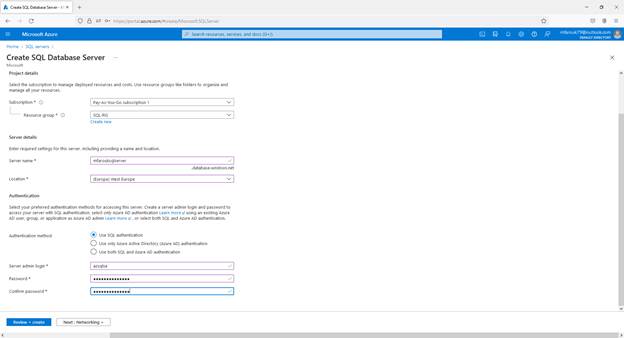
- Fell the requested details then click Next: Networking
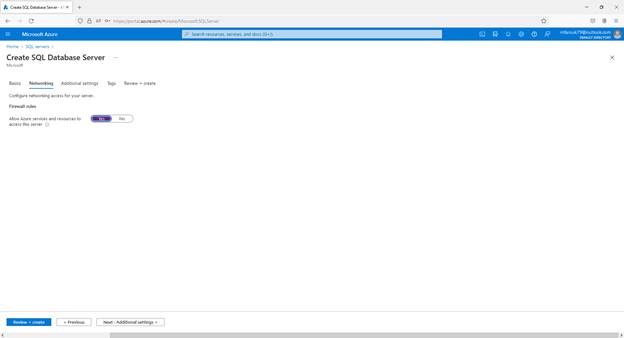
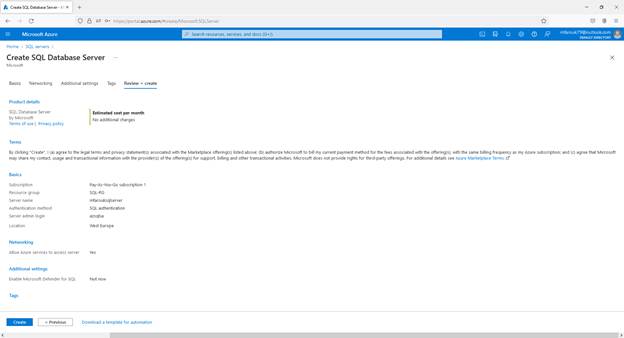
- Choose to allow Azure services and resources to access this server then click Review + Create
- Review settings then click create
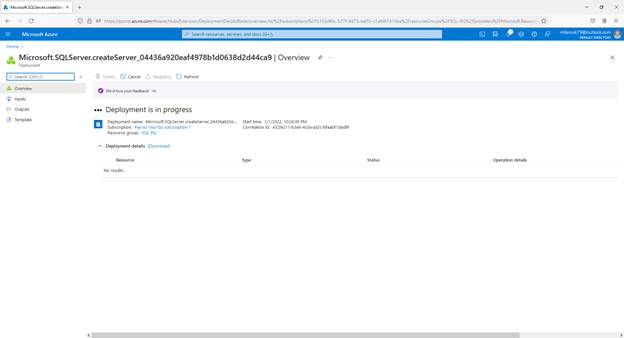
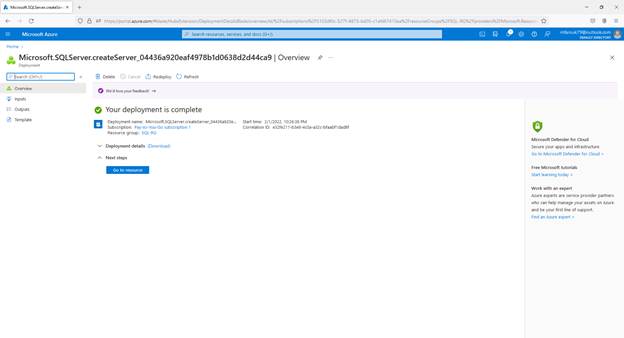
- Wait for the deployment to complete then go to your resource
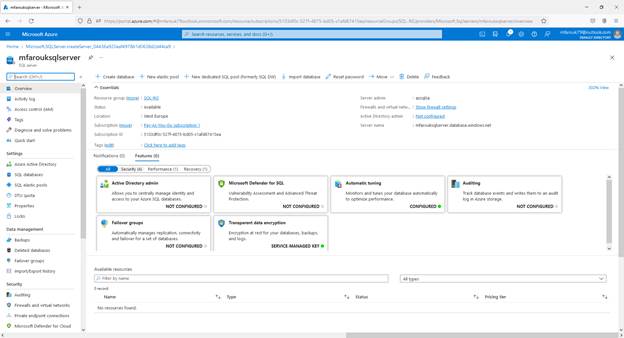
- On the left pane click on Firewalls and virtual Networks
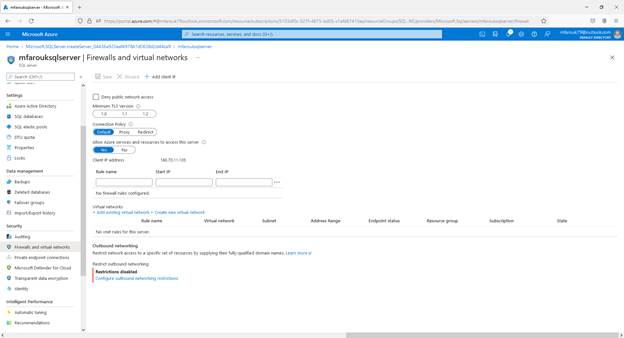
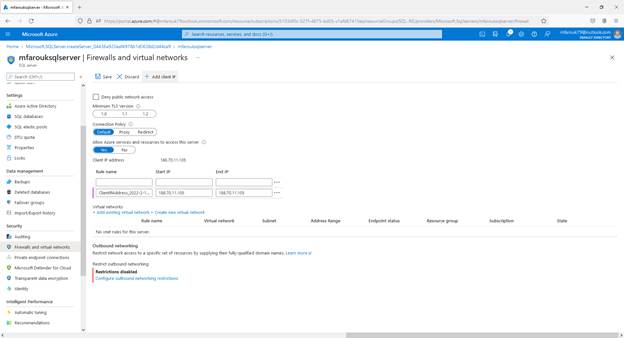
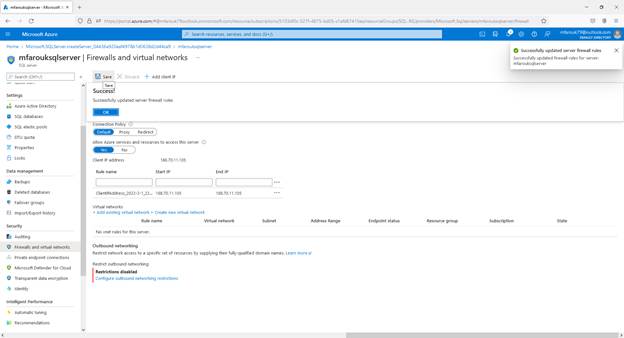
- Click Add client IP, then click save
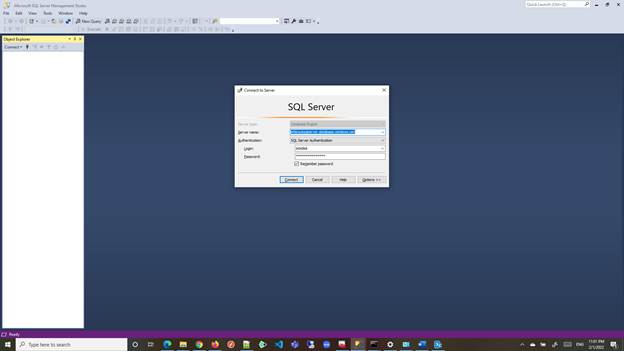
- Test connectivity from SQL Management studio to the database from your client
- From SQL Management Studio, create new empty database on AZURE SQL server that we can migrate our database to it.

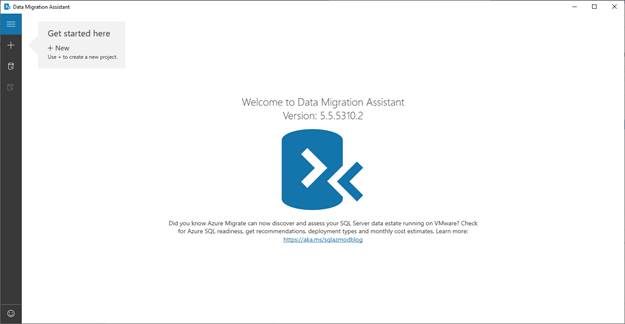
- Download and Install Microsoft Data Migration Assistant to Assess your local database to confirm compatibility with AZURE SQL
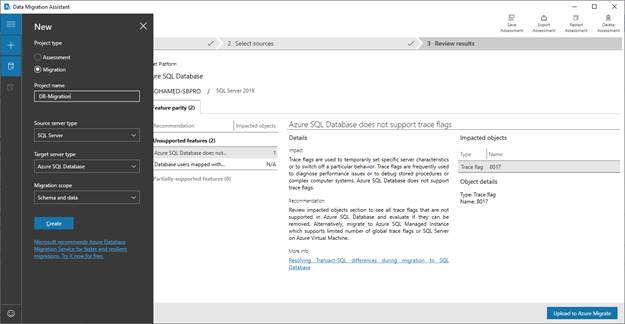
- Click New and enter project name and select source and destination then click create
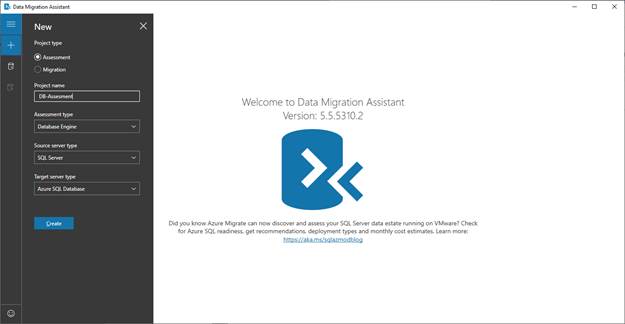
- Accept defaults and click Next
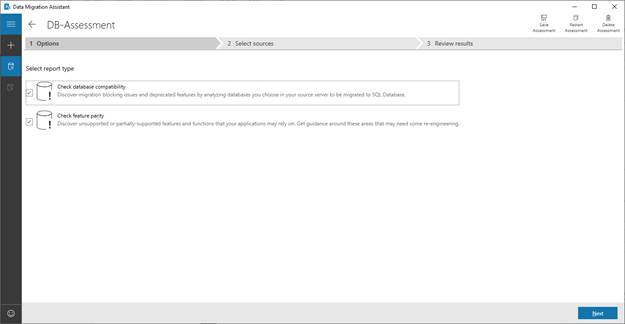
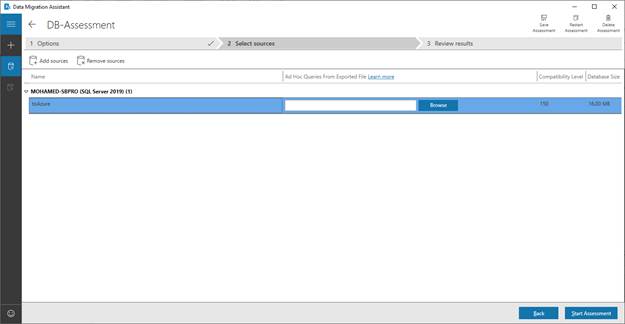
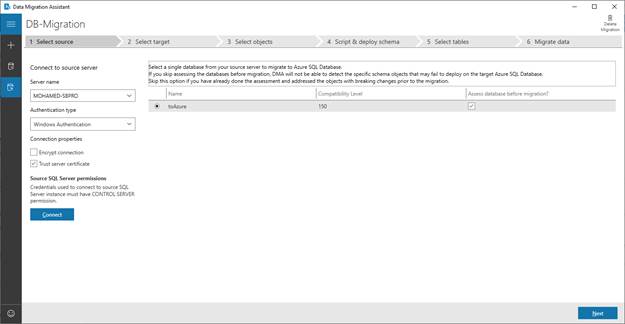
14. Connect to local server

- Add source database to assess

- Click start Assessment
17.
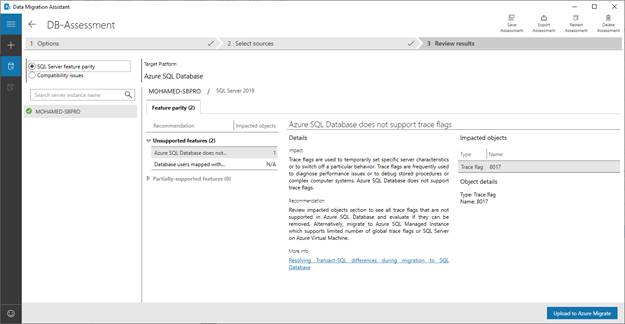
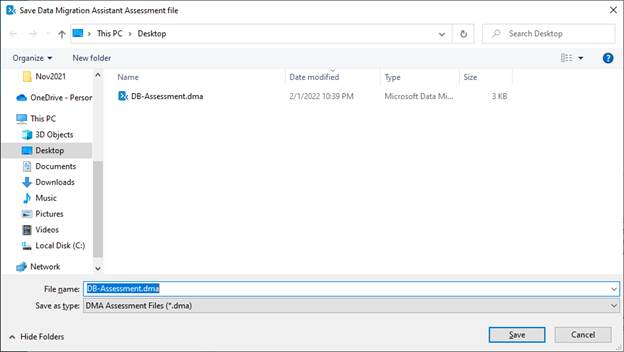
- Click save assessment
- Now click on the + Icon and choose new migration
- Choose source server and click connect then click Next
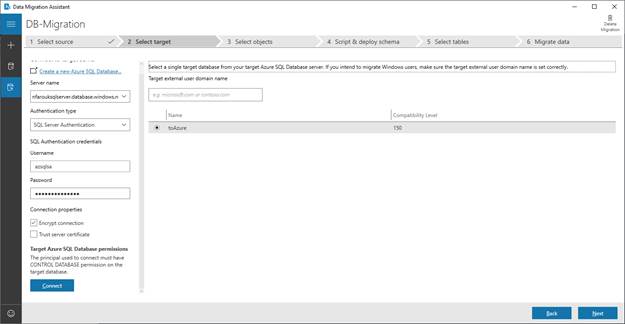
- Connect to AZURE SQL Server and click connect
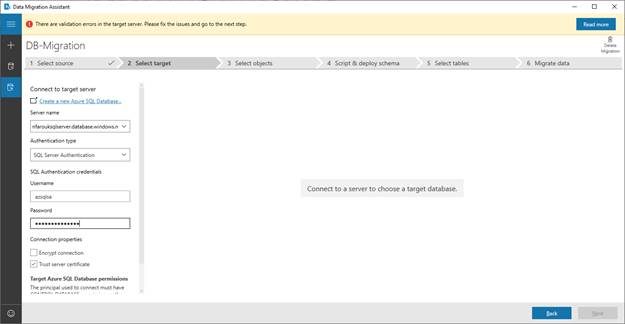
- Choose destination database then click next
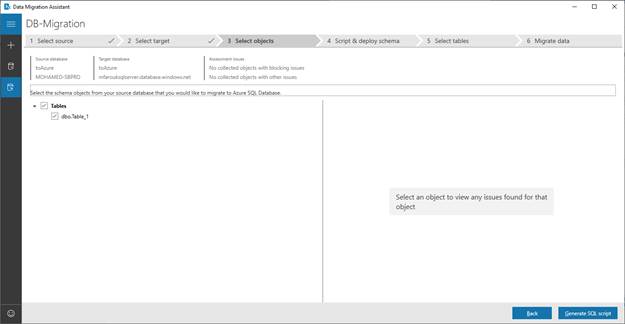
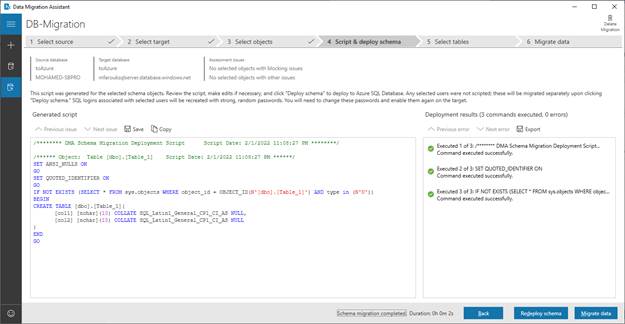
- Choose objects you want to migrate then click Generate SQL Script
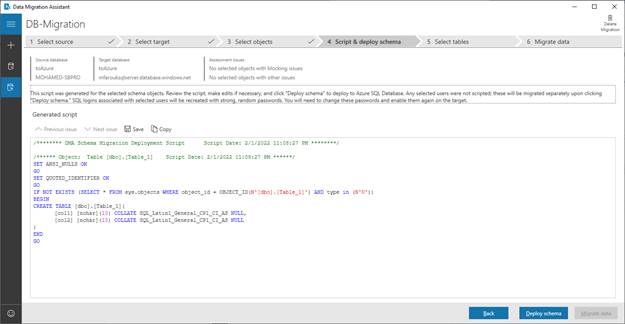
- Click deploy schema
- Click Migrate Data
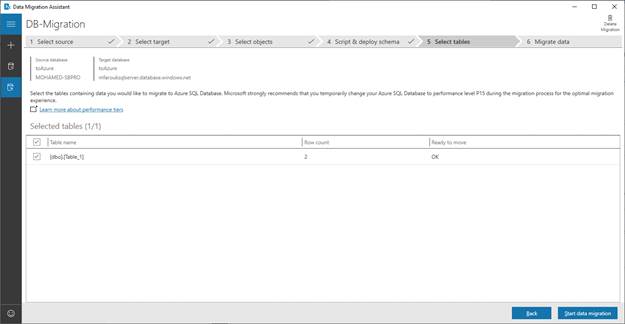
- Click Start data migration
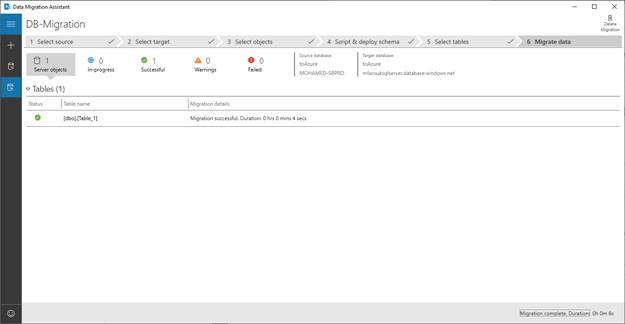
- Connect from SQL Management Studio to AZURE SQL Database to validate table creation

References
https://azure.microsoft.com/en-us/products/azure-sql/#product-overview
https://www.microsoft.com/en-us/download/confirmation.aspx?id=53595
https://docs.microsoft.com/en-us/sql/dma/dma-overview?view=sql-server-ver15
https://docs.microsoft.com/en-us/azure/azure-sql/database/sql-database-paas-overview
TAGs: azure SQL , SQL server, SQL server db migration to Azure SQL , azure SQL server databases