Today we will talk about creating a CI Pipeline to build the application using Azure DevOps, before proceeding with the steps, let us go through some definitions to be able to understand the steps better.
Continuous Integration pipeline:
A CI
pipeline is a series of steps that must be performed in order to deliver a new version of software. Continuous integration delivery (CI) pipelines are a practice focused on improving and automating software delivery using DevOps.
In this article we will go through the following steps to create a build to be used in deploying .Net Core sample application.
DevOps:
A compound of development (Dev) and operations (Ops), DevOps is the union of people, process, and technology to continually provide value to customers.
What does DevOps mean for teams? DevOps enables formerly siloed roles—development, IT operations, quality engineering, and security—to coordinate and collaborate to produce better, more reliable products. By adopting a DevOps culture along with DevOps practices and tools, teams gain the ability to better respond to customer needs, increase confidence in the applications they build, and achieve business goals faster.
Now let us go through the steps:
Setting up AZURE DevOps for the first-time use and creating new organization:
Image-1
- Open your browser and go to httsp://dev.azure.com
- Click Sign into Azure DevOps.
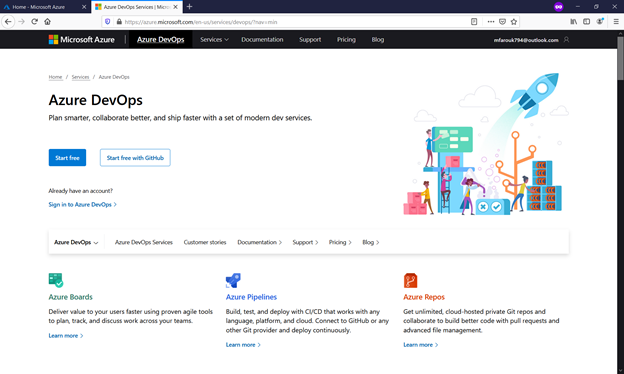
Image-2, 3
Sign in and enter your credentials.
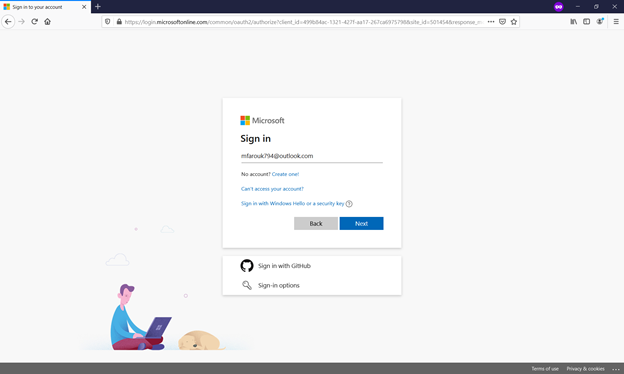
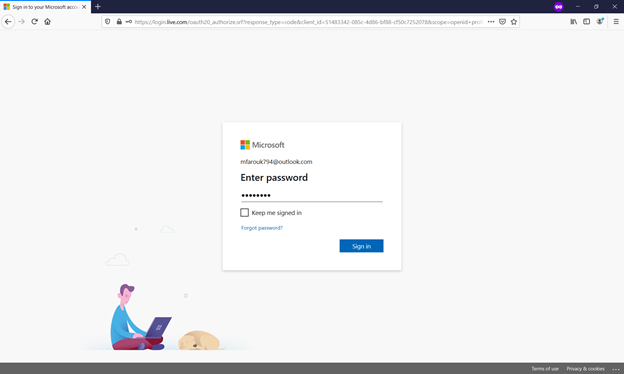
Image-4
Enter required details then click continue.
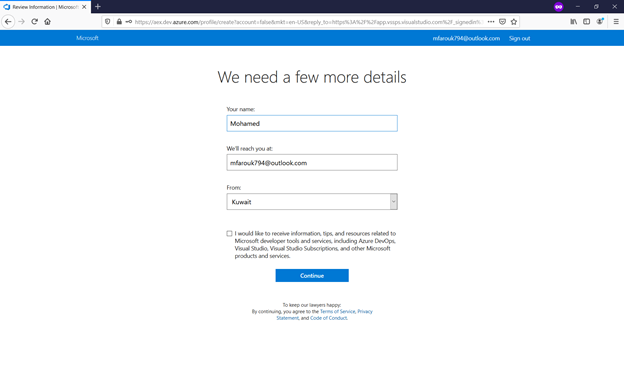
Image-5
Click continue.
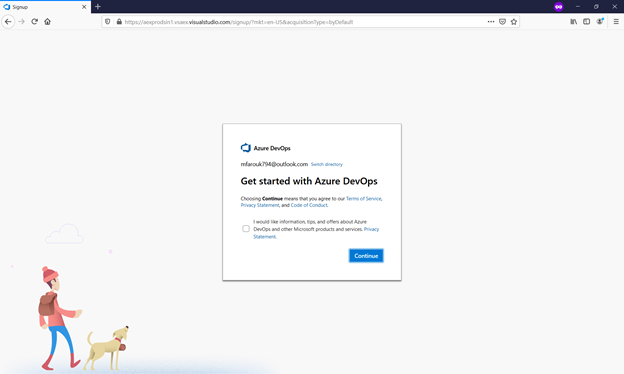
Image-6,7
Now you need to choose name for your organization and project location, then validate you are human by entering characters show in the screen, then click continue.
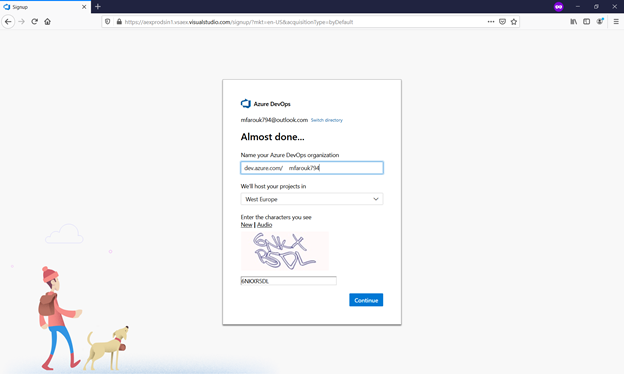
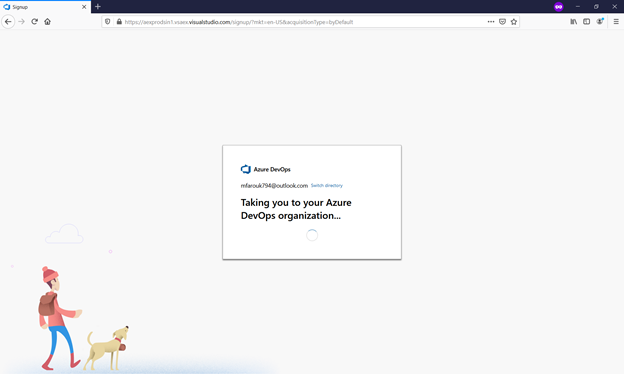
Image-8
Now you are in Azure DevOps home page, lets start by creating project.
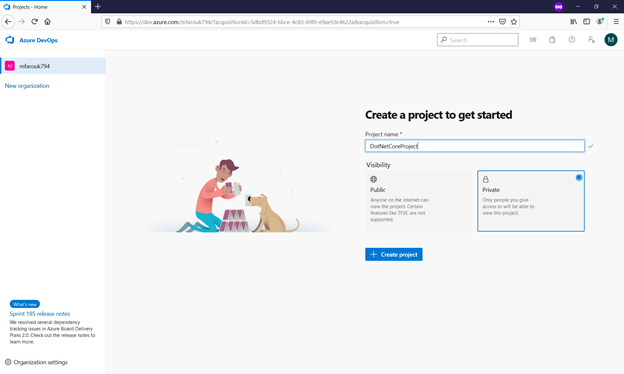
Choose visibility to private or public depending on your requirement then click create project.
Image-9
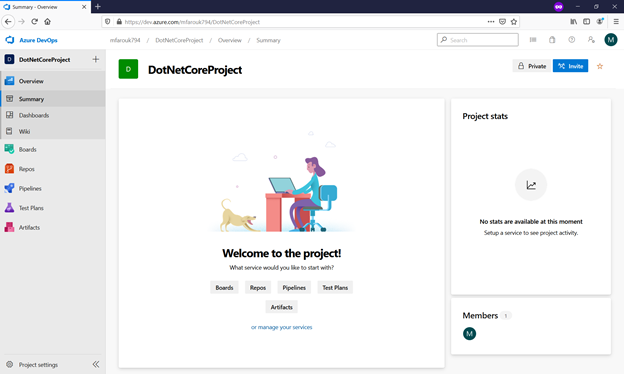
This is the project summary page where we can find all the tasks related to the project.
Now let us get our dot Net application to our Repository on AZURE.
Image-10
In this demo we will depend on a sample application from Microsoft Azure-Samples on GitHub repository
You can access the sample code from the following url:
https://github.com/Azure-Samples/dotnet_core_sample
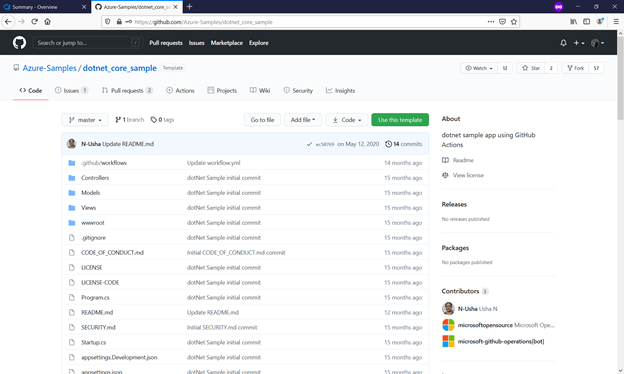
Image-11,12
Now will import the code into Azure repository.
Click on Repos then click Import repository.
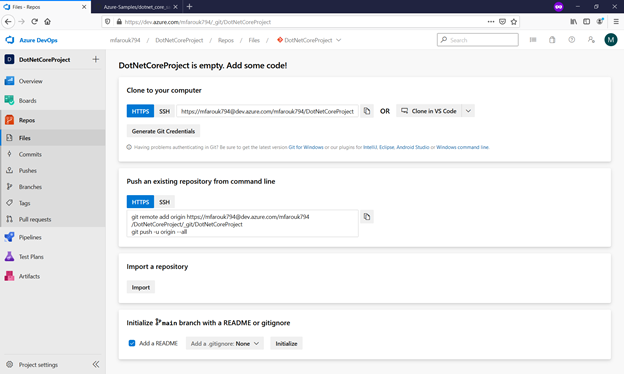
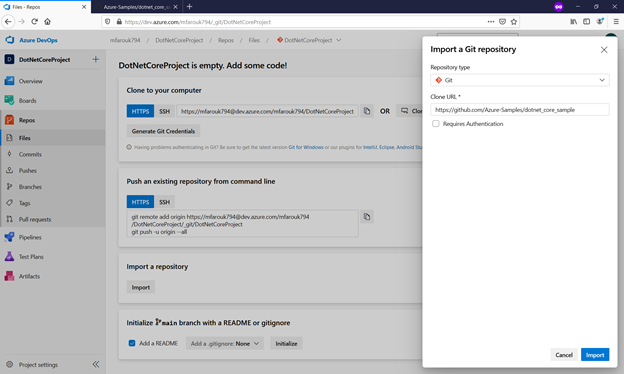
Paste the URL of the sample application from Git repository.
Image-13, 14
We can see Import in progress and succeeded.
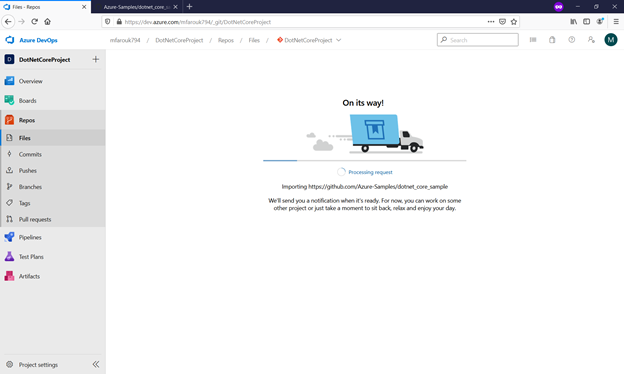

Image-15
Now the application imported in Azure repository.
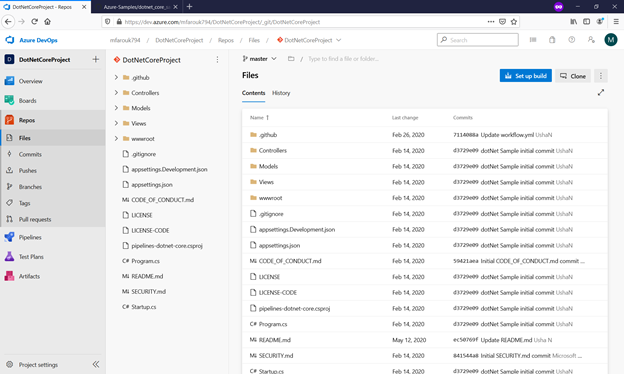
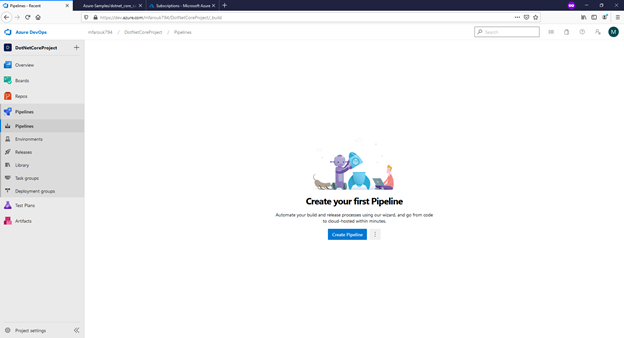
let us create a CI Pipeline for the project
Image-16, 17
Click Pipelines and then click create pipeline .
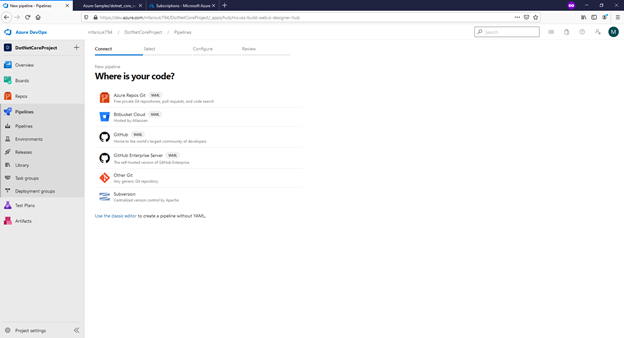
Click use the classic editor.
Image-18
Choose Azure Repos Git, then select DotNetCoreProject and click continue.
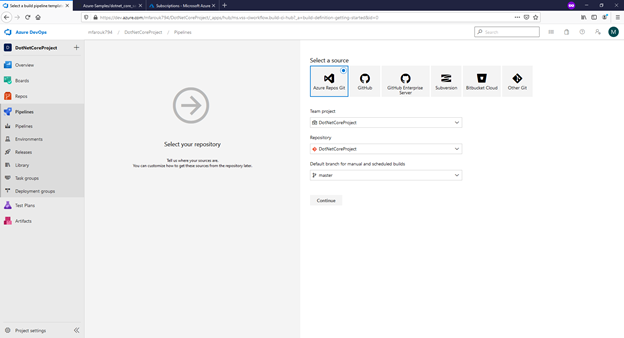
Image-19
Choose the template you want to use; we have to choose .Net Core and click apply.
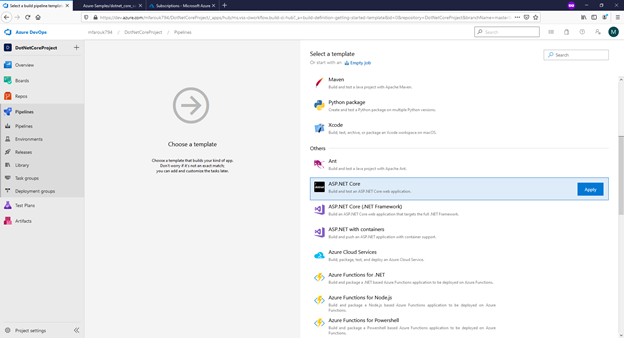
Image-20

We have the name of the pipeline.
Agent Pool: executes on an agent from the selected pool. You can select a Microsoft-hosted pool, or a self-hosted pool that you manage.
Parameters: the project to restore and build, so it will look into the repository for any file .csproj
Projects to test: will look into the repository for any file for unit testing.
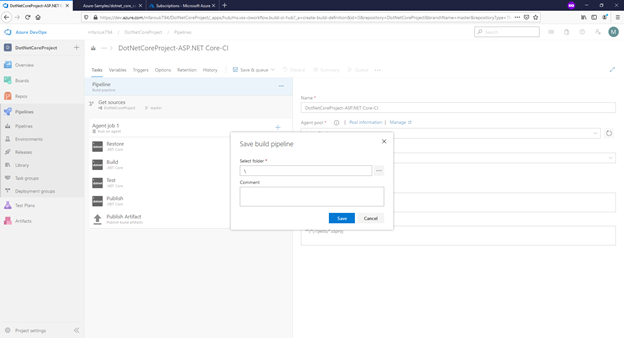
Image-21, 22
Click the arrow beside save & queue then choose to save.

Now we can queue our pipeline, click queue then click run.
Image-23
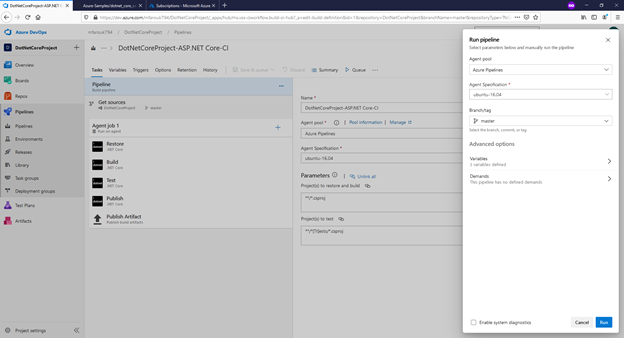
Image-24
The pipeline now is running.
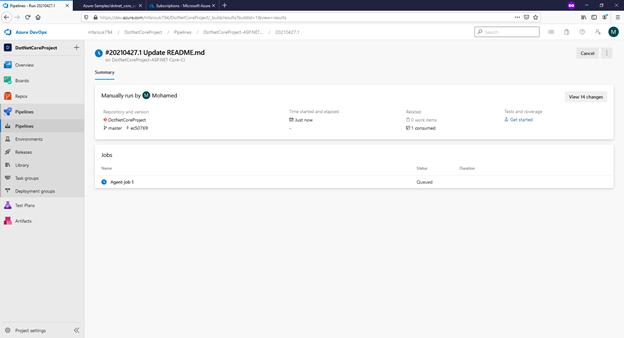
Image-25
The CI pipeline completed successfully.
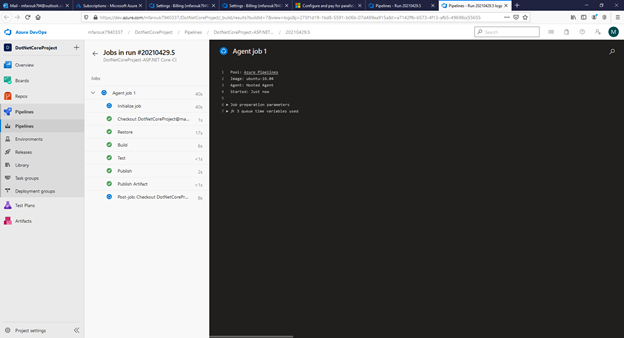
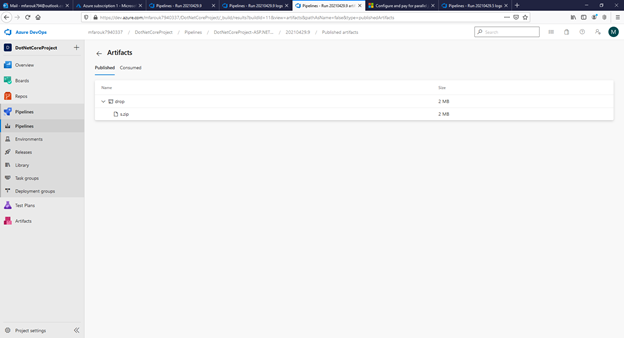
Image-26
We can see that the CI pipeline created build artifact and we can see it from here, click 1 artifact produced.
In my next article will show you creating CD (continuous delivery) and creating App service to deploy the .Net application on AZURE.
TAGs: Creating A CI Pipeline to deploy,Devops,Azure